Category: Business Services

How Replacement Windows Can Improve Your Home

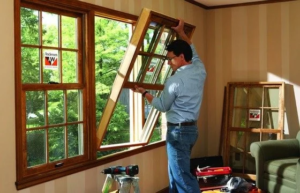
If you’re looking to replace your windows, it’s important to do some research. It will help you narrow down your options and find the best fit for your home.

Replacement Windows Lexington KY offer more than natural light and a refreshed look. They also come with many benefits that will last a lifetime.

Improved Energy Efficiency

Energy-efficient replacement windows can provide a number of ways to save money and improve your home’s comfort. They reduce unwanted heat loss and condensation, helping your heating and cooling systems work more efficiently. They also help prevent harmful UV rays from entering your home, which can cause fabric and wood furniture to fade over time.

New replacement windows can also reduce noise, creating a quieter indoor living environment for you and your family. They are especially useful if you live near a busy road or other noisy areas, as they help to reduce traffic and construction noises.

While you may be paying more upfront for your replacement windows, they can often help you recoup the cost in savings on your utility bills and increased home value when it comes time to sell your house. According to Remodeling Magazine, vinyl window-replacement projects have one of the highest returns on investment among all remodeling projects, with homeowners able to recoup around 80 percent of their installation costs.

Choosing the right replacement window is essential to ensure that your project provides the best possible return on investment. Experienced installers will use quality materials and tight seals to prevent air leaks, improving insulation and overall performance. They can also add energy-efficient features such as low-E coatings and argon gas-filled panes, allowing you to reap the benefits of reduced energy consumption while still enjoying your view and comfortable indoor temperatures.

Replacement windows come in a variety of styles and materials, ensuring that you can find the perfect fit for your property’s architectural style and interior design. They are also available in a wide range of finishes and colors, allowing you to customize your replacement window for a truly unique look.

Better Aesthetics

Your home’s aesthetics are a clear representation of your personality and style preferences. From paint colors to furniture, wall art, and more, every element works together to elevate your living spaces and create a lasting impression on anyone who enters your home. The same is true for your windows — replacing old, outdated windows with modern ones can drastically improve your home’s appearance.

Whether you opt for casement, sliders, bay, bow, awning, or picture (fixed pane) windows, today’s replacement options come in a wide range of designs to fit your personal style preferences. From grilles to muntins, the countless options available allow you to customize your window’s design to perfectly complement your home’s architectural details and interior decor.

In addition to their aesthetic appeal, many of today’s replacement windows come with features that make them more energy efficient. From low-E coatings to inert gas fills between glass panes, these features minimize heat transfer and can significantly reduce your energy bills.

As a result of their energy efficiency and superior aesthetics, new replacement windows are a top renovation choice among homeowners looking to boost their home’s curb appeal. The right window replacements can dramatically change your home’s exterior, instantly elevating it to the next level of beauty and value.

Quieter Home

When you replace old windows, you create a sound barrier against unwanted outdoor noise. Modern double- and triple-paned windows reduce outside noise, making your home more peaceful and relaxing. This is especially helpful if you live near a busy road or under a flight path.

Window replacements are also easy to open, close and clean. This helps you keep them looking great and protects the interior of your home from moisture. If you have older windows, moisture can damage the frame and cause rot and mold. New replacement windows prevent this by preventing air leaks and heat transfer, creating a more stable indoor temperature.

In addition to reducing energy use, new windows can help you save money by lowering your heating and cooling bills. The superior insulation of new replacement windows helps keep your home at a more comfortable temperature, reducing the load on your HVAC system. This means you can save on energy costs and potentially extend the life of your equipment.

Replacement windows allow you to upgrade your home without disrupting the existing walls, trim and siding. This makes them a cost-effective option for homeowners who want to improve the look of their property without major renovations.

Increased Home Value

When it comes to increasing your home’s value, few projects are as effective as replacement windows. Depending on the style you choose, energy efficiency and curb appeal, this project can provide a great return on investment at resale.

In addition, premium replacement windows can increase your home’s value with the added benefit of lower utility bills. The government-backed Energy Star label indicates that homes with these windows can save an average of 12% a year on their energy bills. That savings can add up quickly.

New windows can be a smart choice for any homeowner, but they are especially attractive to those who might want to sell their home in the future. Buyers will recognize the enhanced beauty and energy efficiency of new windows, and are often willing to pay a premium for these features.

If your window frames are rotting, warping or in disrepair, it’s time to consider replacement options. Leaking and drafty windows can eat away at your home’s energy efficiency and comfort, as well as your wallet.

Unlike a new construction window, which is typically used in newly built homes or additions, replacement windows do not require major alterations to the existing walls and trim. This means that they can be installed in homes of any age, from historic to contemporary. They are also a good choice for homeowners who prefer not to disrupt the architectural integrity of a home’s exterior. In fact, bay and bow windows are a popular option for people looking to enhance their home’s exterior beauty without changing its architectural look. These windows feature three or more windows angled together to create an extra space and an inviting reading or seating area.

Increased Home Comfort

Unlike older windows that leak and allow air from outside to slip into your home, new replacement windows will keep your indoor air trapped inside for maximum comfort. This also reduces your reliance on the heating or cooling system, saving you money.

With the winter chill setting in, new windows will keep your home warm and cozy. This is due to their advanced design that prevents cold air from seeping into your space, keeping you toasty throughout the entire season.

In addition, new windows offer superior insulation that creates a stable indoor temperature year-round without drafts or hot or cold spots. They also prevent air leaks, reducing your energy usage and carbon footprint.

The summer sun is lovely, but it can cause excessive heat in your space and damage furniture and other materials. Thankfully, replacement windows with built-in tints can neutralize these harmful UV rays, keeping your space comfortable and preserving your furniture.

Another way to increase your overall home comfort is by installing noise-reducing replacement windows. These windows will minimize exterior noise, such as street sounds, neighborhood dogs, heavy equipment, trains, or planes, creating a peaceful and relaxing atmosphere for you and your family to unwind in.

New windows will also help prevent the growth of mold and other allergens, making your home a healthier place to live. Old windows prone to air leaks and condensation can create an ideal environment for these allergens, which can trigger health issues. This is because the moisture can make its way into your walls and furniture, which can then trigger asthma and other respiratory problems. However, the proper insulation and preventing air leaks that are common with older windows will prevent these issues.

Ceiling Repair – How to Get Rid of Cracks and Holes in Your Ceiling

If you have a minor crack or hole in your ceiling, repairing it is generally cheaper than replacing the entire section. It also helps keep your home in good shape and may even prevent a more serious problem down the road.

Start by assessing the damage, gathering the necessary tools and materials, and patching the holes or cracks. Then, sand the surface to prepare it for priming and painting. Contact Ceiling Repair Perth now!

Over time, every home experiences wear and tear, including the ceiling. Problems can range from cracks to sagging, water damage and even mould. If these issues are left unattended for too long, it can lead to a number of costly repairs and may affect the overall value of your home. If you’re planning to sell your property in the future, it’s important to repair any problems with your home’s ceiling as soon as possible.

The first step in repairing your damaged ceiling is to assess the extent of the damage. This can help you determine whether the issue is cosmetic or structural. You’ll want to identify any water stains, discolouration and bubbling in order to determine the best approach. If the damage is widespread, you may need to remove sections of your ceiling to prevent further deterioration and potential collapse.

After assessing the damage, it’s important to dry out the affected area as quickly as possible. This will prevent further water damage and also help to stop the spread of mould. You can do this by turning off the power in the area, removing any items from the ceiling that have been affected and opening windows to improve ventilation. Using fans and dehumidifiers can also help to speed up the drying process.

Once the area is dry, you can start to repair any holes or cracks in your ceiling. This is a relatively straightforward task for DIYers, though it’s important to take care and use good technique. You’ll also need to ensure that you have all of the necessary tools before you begin. It’s also recommended that you wear a dust mask and eye protection while working on the ceiling, especially if there are any signs of major water damage.

When repairing cracks in your ceiling, you’ll need to apply a drywall patching compound or Spackle to the damaged areas. Once this has dried, you’ll need to sand it smooth and then repaint the area. Before painting, you should apply a stain-blocking primer to prevent any water stains from bleeding through. It’s also important that you choose a high-hiding ceiling paint in a neutral colour.

If you’re tackling ceiling repair, it’s important to have the proper tools and materials to get the job done. This includes a good quality brush, sandpaper and primer to ensure that your repaired surface looks professional. You should also have a variety of paint colors available to match your existing ceiling texture and color scheme.

Before starting any repairs, you should clear the area of furniture and cover surfaces to protect them from dust and paint splatters. If possible, removing or covering furniture can save time and money by reducing the amount of cleanup required afterward. You’ll also need to have a drop cloth or plastic sheeting handy to catch any drips and spills, which can quickly cause damage if not cleaned up promptly.

Once the ceiling is clean and dry, you’re ready to start repairing holes or cracks. A drywall patch kit is typically adequate for small holes or cracks in your home’s ceiling, and these kits are readily available from most home improvement stores. However, if the crack or hole is significant, you may need to hire an experienced contractor. Larger holes or cracks, especially those caused by water damage, can often require extensive repair and retexturing to avoid mold growth and other structural issues.

Likewise, if your ceiling is covered in popcorn texture, you’ll need to remove it before proceeding with any repair or painting. Popcorn texture can be difficult to remove and is more prone to cracking or mold growth than standard drywall. A professional will be able to use the correct removal methods and techniques for the most effective results.

Finally, be sure to select a high-quality primer that’s designed for use on drywall or ceilings. This will help seal the repaired area and prepare it for paint application. Follow the manufacturer’s recommendations for application and drying times.

As with any repair project, it’s essential to take your time and carefully assess the damage before beginning the work. Careful inspection and evaluation can prevent costly mistakes in the future, and it can even help you decide if repair or replacement is the best option for your ceiling.

If there are holes in your ceiling, these need to be patched to prevent water damage from seeping into other areas of the home. Large holes can also leave the underlying structure vulnerable to wood rot and mold, so it’s important to address them as soon as possible.

Before you begin repairing your ceiling, it’s a good idea to lay down a tarp or piece of plastic in the area where you will be working. This will help catch any falling debris and keep your furniture protected from paint or plaster dust. You’ll also want to set up a ladder that can reach the damaged area. If you’re a homeowner, this may mean using an A-frame ladder, while renters can probably get by with a step ladder that is sturdy enough to support you while you work.

Start by cleaning the area around the hole with a damp rag or cloth. This will remove any dirt or dust that could prevent the drywall tape from adhering properly to the ceiling. If there is any loose drywall, use a utility knife to pry it up. Make sure to wear a dust mask while doing so, as sanding drywall creates plenty of dust.

Next, prepare the area to be patched by applying a thin coat of joint compound, also known as drywall mud or spackle. This will help fill in the holes or cracks and ensure that the new drywall is strong.

Once the drywall compound has dried, you can apply a second coat and sand it smooth. You will likely need to sand a third time, or more, before the area is smooth and ready for painting.

If you’re dealing with a large crack in your ceiling, you may need to reinforce it. This is especially important if the crack extends past the edges of your home, as this can cause structural problems. If the crack is very wide, you can add extra support by applying mesh or paper drywall tape to the surface.

If you’re worried that your cracks will reappear, you can add an extra layer of protection by using a flexible product like Elastopatch. This can be applied with a brush directly over the crack, or it can be applied to areas that have been filled with compound or spackling. Once it dries, you can then sand it smooth and apply a coat of primer to finish the job.

As with walls, repairing cracks and holes in the ceiling can be a time-consuming job. Whether you choose to tackle the job yourself or hire a professional, it’s best to prepare the area by removing shelves and any hanging hardware like electrical outlets or light switches. You should also protect furniture with drop cloths and mask off mouldings, trim, windows and the ceiling.

If the cracks and holes are cosmetic and do not cause water damage or a structural issue, you can patch them yourself using drywall compound or spackle. You’ll want to wash the wall to remove any grease before applying the filler and sanding it down so that it is flush with the existing wall. Once you’re finished sanding, priming will seal the filler and keep it from coming off in the future.

When it comes to larger holes or sagging areas, you may need to replace the damaged drywall panel. If this is the case, you’ll need to clear the attic insulation and remove the old drywall before installing the new panel. Then, you’ll need to tape and mud the edges of the replacement to ensure that the seams and joints are watertight. Finally, you’ll need to sand the surface of the drywall to prep it for painting.

It’s important to prime any surface that you intend to paint, regardless of the color. Priming creates a surface that the paint can bond to, which will help ensure smooth and even coverage. It’s especially important to prime surfaces that have been coated with a glossy finish or those that were previously painted with oil-based paint.

If you don’t prime the wall before repainting it, you could end up with bleed through of the original color or a lighter shade. This can be especially noticeable if you’re changing from a dark color to a lighter one, as it can take multiple coats to achieve full and even coverage. In this case, it’s even more important to use a high-quality primer that provides good adhesion and stain blocking properties. This will ensure that the new paint won’t bleed through and ruin the appearance of your room.

Navigation