A professional heating and air repair technician can help you solve a wide variety of HVAC problems. But some of the most common furnace and AC issues are easy to fix yourself.
First, make sure your return and supply vents are open and unblocked. Also, check that your thermostat is set to AC mode and lowered to a lower temperature.
1. Clean the Vents and Registers
A common service offered by professional cleaning services is cleaning the vent covers, grates and grilles of a customer’s home or business. Typically, this involves a quick swipe across with a feather duster to remove dust, hair, lint and other gunky particles that would otherwise become airborne.
The problem is that over time, this won’t be enough. As climatic changes cause the air to get humid, these particles begin to stick to the vent covers and other surface areas. If left unchecked, they can build up and create a sticky mess that is difficult to clean.
This can lead to a reduction in the amount of air flow into a room or space, making it harder for a heating and cooling unit to maintain optimal performance. Fortunately, it is relatively easy to remedy this issue by cleaning the vents and other surfaces regularly.
First, make sure the heating and cooling system is turned off. Next, take a vacuum cleaner with a brush attachment and remove as much of the dust and debris from the floor vents and wall duct registers as possible. You can also cover the openings to your ducts with paper towels, to prevent dust from temporarily blowing onto your walls and floors as you work.
You should then take any vent covers that are easily removable and wash them in a sink of warm, soapy water. Make sure they are completely dry before reinstalling them on your home’s vents. If the vents are plastic, you can add a cup of hydrogen peroxide to the mixture to whiten them, allowing them to sit for an hour before rinsing and drying again.
You should also check for any signs of mold on or around your vents. Any specks of black that look like soot on or near your vents could be mildew and should be addressed immediately by an HVAC technician. This will prevent the mildew from spreading to other parts of your home’s ventilation system, which can lead to costly repairs. This is particularly true if you find a musty smell or dampness inside a vent.
2. Change the Air Filter
One of the simplest ways to keep your air conditioning unit running smoothly is to replace the filter on a regular basis. Filters are responsible for protecting your system from debris, pet hair and dust that can clog it. They also help to preserve your indoor air quality by keeping the contaminates in the filter rather than recirculating them around your home.
If you forget to change your filter, it can lead to a number of problems with your air conditioning unit. A dirty filter can force your system to work harder to warm or cool your house, which can cause it to break down more quickly. It can also affect your indoor air quality by limiting or preventing air flow and spreading mold spores throughout the house.
Changing your air filter is simple and inexpensive, but it’s important to remember to do it regularly. You can write the date on your filter so you know when it needs to be replaced, or you can set a reminder in your phone or online calendar for every three months. It’s also a good idea to sign up for a service that ships you filters on a monthly basis to ensure you always have a fresh one.
To change your filter, first make sure the power to your AC is turned off. This is a safety precaution and will prevent the system from accidentally sucking in debris while you’re working on it. Once the power is off, pop open the cover and remove the old filter. Carefully clean the filter or clean a reusable one (if applicable). If your filter has air flow arrows on it, note the direction they’re facing so you can properly install the new one.
Once you have the new filter in place, close the cover and restore power to the AC. If your system has a reusable filter, follow the manufacturer’s instructions to wash it thoroughly and let it dry completely before installing again.
3. Check the Thermostat Settings
The thermostat controls your HVAC unit, and if it’s not working correctly you may find that the temperature in your home isn’t the same as what you’ve set. This could be frustrating and inconvenient for you and your family, but it’s a relatively simple fix, so don’t be afraid to give it a shot before calling an HVAC technician.
One of the first things to check is whether or not the screen on your thermostat is lit. If it isn’t, then your thermostat isn’t getting power and won’t be able to communicate with the air conditioner. This problem is usually the result of dead batteries or a tripped breaker in your electrical panel.
Make sure that the batteries are fresh, then swap them out for a new set. If the screen is still dark, it’s time to look for other causes of this issue.
Programmable thermostats can lose their settings over time, so it’s important to re-calibrate them from time to time. To do this, place a thermometer in the same room as your thermostat and take note of the temperature reading. Then, compare the thermometer reading to your thermostat setting. If the thermostat is off by more than a few degrees, it’s time to recalibrate it.
If the reading is the same, then you might need to replace your thermostat’s batteries. Old batteries can lose their charge and cause problems, so it’s a good idea to change them out once a year.
It’s also possible that the thermostat isn’t positioned properly. It should be attached to the wall in a perfect horizontal position, but over time, it can detach from the wall or sink down, which will cause it to lose its perfect positioning. This is a common problem with older thermostats, but it’s an easy fix and can be corrected by simply moving the thermostat again.
If you’ve checked the battery, the breaker, and the temperature sensor and still can’t get your thermostat to work correctly, it might be time to call an HVAC professional. However, before you do, try these simple troubleshooting solutions to see if they work.
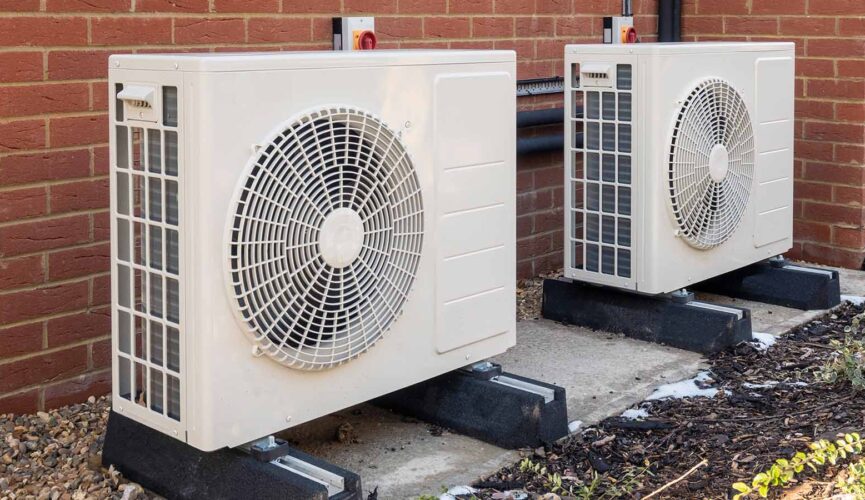
4. Clean the Condenser Coil
The air conditioner’s coils collect dirt over time, particularly from the outdoors. When they become dirty, they make the system work harder to do its job. This can increase energy bills, lead to system repairs and shorten the unit’s lifespan. Keeping the coil clean is one of the best ways to improve your air conditioning’s performance and efficiency.
Aside from regular maintenance, a simple wash with water is usually all it takes to get the coils clean. Begin with the outdoor unit, turning off the power to it at the breaker box or pull out a fuse in the disconnect block (standard on many units). Next, remove the cover and locate the evaporator coils. These are usually in a tent-shaped structure inside the housing. You may need to use a screwdriver to loosen the screws that hold the cover on; this will allow you to access the coils.
Examine the coils for large pieces of debris like twigs, leaves and fuzzy plant material that can trap moisture and slow heat release. These can be blown away with compressed air. You can also use a brush to sweep away dirtier areas, but avoid using a brush with hard bristles since this can damage the coils.
After removing the large debris and washing off the coils, rinse them with water from your garden hose. Be sure to rinse the evaporator coil’s fins as well, which are small metal prongs that cover the coil. These can easily become bent by vigorous brushing or a power washer, reducing the effectiveness of your AC. You can straighten these with a fin comb, available at most hardware stores or online.
If your coils are still dirty, use a non-acidic cleaner designed for evaporator coils. Be sure to follow the manufacturer’s instructions for this product, which will likely involve spraying it up and down as you wash off the coils. This will help ensure you don’t damage the copper and alloy parts that make up the coil. Be sure to wear protective clothing, safety glasses and a face mask, and be mindful of the fumes from the cleaning solution.